Waving the Wheat


Freshly ground wheat is a revelation

If you're a college football fan, you've seen it.  Fans of Midwestern teams standing in the stadium, arms raised high and waving back and forth. That's "waving the wheat." 

You can also wave the wheat in the kitchen.

We all know that whole grains are better for us. They contain all the nutrients of the grain including the oil in the inner part or germ plus the fiber from the outer layer or bran.

What we don’t often hear is how delicious freshly ground grain can be.  It has a fresher (of course!), nuttier flavor than flour that has been sitting in a bag for a while.

What you also don’t often hear is that harvested wheat berries or kernels need about 3 months of maturing in a grain silo before the wheat is ready to be milled into flour. This time period allows the berries to lose moisture so the resulting flour will be dry, like it’s supposed to be, instead of gummy. So, it's right about now that wheat harvested in the summer is ready for milling.

Heartland farmers knew all this, of course, so they’d store the grain and then use a hand-cranked grinder to grind the wheat berries into flour. You see the harvested wheat on the stalk, the threshed wheat kernels in the bowl, the flour mill and the coarsely ground flour in the pan.

Milling Wheat the Old-Fashioned Way


We’re lucky in the Midwest that we can often find grocery stores (Hy-Vee, for example) that have electric grain mills for wheat just as you could find a coffee bean grinder in the coffee aisle. You just put the whole wheat berries or kernels in the top of the mill, choose your grind (fine, medium, coarse) and press a button.  You’ll get home-ground flour that’s delicious.  Just remember to put the bag at the bottom of the chute or you’ll look like the Ghost of Wheat Harvests Past, covered in flour.

At home, I have an electric grain mill that does the trick in seconds. I can also grind dried soy beans or millet, steel-cut oats, or any other grain or dried bean into fresh flour.

I urge you to try freshly ground wheat or packaged whole wheat flour in a delicious new bread with the added flavor of your favorite granola.  

Now that the weather is turning crisp again, it’s time to get out that bread machine and take it for a spin.  


You can set the delay timer and wake up to the sweet and spicy aroma of Great Plains Granola Bread, still warm from the “oven.”

Now, if only someone could put the coffee on. . . .

Great Plains Granola Bread


Great Plains Granola Bread

In the 1970s, Peavey Flour Mills in Minneapolis, Minnesota, milled a granola flour that made a wonderful, nutty-tasting bread. Today, you can make a terrific granola bread yourself by grinding granola in the food processor. If you can’t find milder-tasting white whole wheat flour in your area, then just use regular whole wheat flour. This whole-grain loaf has wonderful texture. Recipe from The Artisan Bread Machine by Judith Fertig (Robert Rose, 2011).

Makes 1 (1-1/2 pound) loaf

Delay Timer

Equipment
Food processor or blender

3/4 cup prepared granola     
3 tablespoons large-flake (old-fashioned) rolled oats          
3 tablespoons  dried sour cherries or cranberries    
1/2 teaspoons salt      
2 tablespoons vegetable oil   
5 teaspoons liquid honey       
1-1/4 cups boiling water        
2-1/2 cups whole wheat flour , freshly ground or packaged
1-1/2 teaspoons instant or bread machine yeast      
3/4 cup raisins (optional)       
1/3 cup sliced almonds, finely chopped nuts or unsweetened flaked coconut (optional)
1. In food processor, pulse granola until it resembles coarse crumbs.
2. Add granola, oats, dried cherries, salt, oil and honey to the bread pan. Pour in boiling water, stir and let cool for 15 to 25 minutes or until mixture has cooled to lukewarm (between 86°F and 95°F/30°C and 35°C).
3. Spoon flour on top of liquid. Add yeast. Place raisins and almonds (if using) in the dispenser (or add at the “add ingredient” or “mix in” signal).
4. Select the Whole Wheat cycle and the Light Crust setting and press Start.

Tips
*          You can vary the flavor of this bread by using different varieties of prepared granola.
*          Use the Light Crust setting for a medium brown crust; some prepared granolas have a higher sugar content than others and can cause the bread to brown at darker crust settings.


Lard 101


Home-Rendered Deliciousness 

For several generations in the Midwest, lard was the go-to fat in the kitchen for flaky pie crusts and fried chicken.
Then, when margarine and vegetable oil started appearing on grocery store shelves in the 50s and 60s, lard was considered bad. 
Now, lard is good again.  At least the home-rendered kind made from “leaf” fat, so called because it has a long leaf shape. 

Pork Leaf  Fat

Made and kept without preservatives, fresh lard doesn’t have the slightly musky flavor that packaged lard does.  It has about 45% mono-unsaturated fat and no trans-fats. And it still makes the best piecrust and the best fried chicken or potatoes you’ve ever tasted. I also like to use it when I make duck confit in the fall. 
To render or melt lard at home, you need to find “leaf” pork fat.  Usually, a full service butcher shop carries it or can get it for you. In the Kansas City area, I found leaf fat at Bichelmeyer Meats

They also have leaf lard that they’ve rendered, if you don’t want to make it yourself.
The rendering process is easy, but takes a bit of time.  After you trim and cut the fat into small pieces, 


you’ll want to render it slowly so it can be used for both making pastry and frying (if the lard gets too brown, it could make your lard pie crust taste like pork roast). I used the slow cooker, which does the rendering work without too much attention from the cook.  

Herb and Cathy Eckhouse of La Quercia 

in Norwalk, Iowa, render their lard in a 250°F oven. Either way works well. 

You’ll end up with a pale golden lard that turns creamy white. Here, you see a jar of home-rendered lard that is cooling--pale gold where it is still warm, white where it has cooled. 


If you like, freeze some of the lard in pre-measured portions, in ice cube trays or freezer bags, to use for pie crust. Use the cracklings in soups, salads, or cornbread—they taste like toasted sesame seeds.

Home Rendered Lard (from Heartland: The Cookbook)
Makes about 3 cups
2 pounds leaf lard in one piece, membrane trimmed away and the fat cut into 1-inch pieces
1. Place the chopped fat in a 2-quart slow cooker and turn it to the Low setting. Cover and render for 8 to 12 hours or until most of the fat has melted. 
2. Line a funnel with a coffee filter or cheesecloth and place the funnel in the top of a clean,  wide-mouth quart jar. Ladle the hot fat into the lined funnel until only the small pieces of unrendered fat or cracklings are left in the bottom of the cooker. Set the jar of lard aside to cool at room temperature.
3. Turn the cooker to High and let the cracklings turn medium brown, stirring occasionally. Transfer the cracklings to a plate and let cool.
4. Cover the jar of lard and store in the refrigerator. Keeps indefinitely. Place the cracklings in a storage container in the refrigerator and use within 1 month.

Native Persimmons

Now, Forager

One of my favorite novels--one that has all the best ingredients--is Enemy Women by Paulette Jiles, the story of a young Missouri woman who is wrongfully imprisoned during the Civil War and the improbable love she finds with her Yankee captor. Adair Colley  has such a real voice--and she loves native persimmons--as you can tell from her "confession" to Major William Neumann:
In the fall persimmins  were plentiful as well as apples and I liked to put them in a bowl together because of their colors. We roasted the apples and had them with cream. The colors were also beautiful, the cream being a pale yellow and the apple carmine. You put maple sugar all over this, as much as you can get away with.
People like the fictional Colley family used to forage in the fall for native persimmons, black walnuts, and hickory nuts. Today, the locavore movement has made foraging chic again. You can’t get much more local than a plant native to the area.  So, inventive chefs are putting foraged foods on their menus, from bland, sweet mulberries and tannic wild plums in desserts to elderflower foams and local honey infused with wild rose hips for entrees. 

Foraging has also gotten high tech. Jonathan Justus, owner and chef at Justus Drugstore in Smithville, Missouri, uses a GPS navigation system, so he can identify and go back to the area where he finds his goodies—wild rose hips, black walnuts, or elderberries. http://www.drugstorerestaurant.com/
Foraging is also about nostalgia—a hankering for the seasonal dishes your grandma used to make with foods gathered from the wild. Retirees in Wisconsin and Indiana have their own cottage industries gathering labor-intensive hickory nuts (nutmeats picked out of the shell) and persimmons (skinned, seeded, then pulped), preparing them for sale each autumn.
We’re coming into the season for native persimmons, when they’re so ripe they fall off the trees. They have to be perfectly ripe and soft before you can eat them without puckering up.  They’re sweet and bland, much like cultivated persimmons and somewhat like winter squash or pumpkin.
If you know of a grove of persimmon trees, you can go out and gather your own.  Sometimes, farmer’s markets (like Brookside Farmer’s Market in Kansas City, MO) known for organic produce will have some that a farmer has gathered.


Or, you have to know somebody who knows somebody who knows somebody. . .
When you get them home, simply use a food mill to remove the small seeds and the skins so you have persimmon pulp, which you can freeze for up to 1 year.

In recipes, you can substitute pureed squash or canned pumpkin.
Here’s Persimmon Bread Pudding with Warm Cider Caramel
that can be served at breakfast, lunch, or dinner with all the favorite flavors of fall—including persimmon--from Heartland: The Cookbook. It's easy to make, and it has a wonderful cider caramel sauce that just melts together in a saucepan.
http://www.amazon.com/Heartland-Cookbook-Judith-Fertig/dp/1449400574/ref=sr_1_1?ie=UTF8&qid=1316119327&sr=8-1


Persimmon Bread Pudding with Warm Cider Caramel
Is this a brunch dish—or a dessert?  Just for autumn or any time of year? You be the judge. In my opinion, this luscious bread pudding baked in a springform pan is delicious at any meal all year long. It looks great on a cake pedestal and can be made ahead, so it’s perfect for entertaining. If you can get your hands on native persimmon pulp, go for it.  If not, use canned pumpkin or pureed squash or sweet potato.  I love the cake spice mixture from Penzey’s in Milwaukee, Wisconsin, but you can also use pumpkin pie spice. The Warm Cider Caramel is an easy version that makes up in minutes.
Serves 12 to 16
4 large eggs
4 large egg yolks
¾ cup granulated sugar
1 teaspoon vanilla extract
1 cup heavy cream
2 cups whole milk
2 cups native persimmon pulp or 1 (15-ounce) can pumpkin (not pumpkin pie filling)
1 teaspoon cake spice or pumpkin pie spice
¼ teaspoon fine kosher or sea salt
20 (1/2-inch thick) slices soft but firm bread like challah
¼ cup pecans, chopped, optional
¼ cup dark brown sugar, packed
Warm Cider Caramel:
2/3 cup light or dark brown sugar, packed
3 tablespoons cornstarch
2 cups apple cider
6 tablespoons heavy cream
3 tablespoons unsalted butter
¼ teaspoon coarse kosher or sea salt or to taste
1. Preheat the oven to 325°F. Butter the inside of a 10-inch springform pan and wrap the outside with aluminum foil. Set the springform pan in a roasting pan.
2. In a large bowl, whisk the eggs, egg yolks, and granulated sugar together until smooth. Whisk in the vanilla extract, cream, milk, persimmon, cake spice, and salt. Dip the bread slices, one by one, in the egg mixture and arrange in an overlapping pattern that rises in the center in the prepared pan. You will use about half of the egg mixture for the slices. Carefully pour the remaining custard over the slices and let rest at room temperature for 30 minutes.
3. Make a water bath by pouring about 3 cups hot tap water in the roasting pan so that the water comes about halfway up the sides of the springform pan. Bake for 45 minutes.
4. Combine the chopped pecans and brown sugar. Remove the bread pudding from the oven and sprinkle this mixture on topping. Return the bread pudding to the oven and bake for 15 additional minutes or until a toothpick inserted in the center comes out clean. Allow to cool in the pan for 20 minutes, then carefully peel back the aluminum foil, lift the pan out of the water bath and remove the sides.
5. For the Warm Cider Caramel, whisk the brown sugar and cornstarch together in a large saucepan. Press out any lumps with your fingers. Stir in the cider and cook over medium-high heat, whisking constantly, until large bubbles form around the perimeter of the pan and the sauce thickens, about 10 to 12 minutes. Remove from the heat and whisk in the cream, butter, and salt. Serve drizzled over the cake.

Have a Pletzel!

Eastern European Flatbread Is Pure Comfort Food
The weather has just turned cool and crisp. The last tomatoes are ripening in the garden, and the sky is blue, blue, blue.
Soon, for me, it will be soup and bread weather. One of my favorite flatbreads is one I first tried when I was developing recipes for 200 Fast & Easy Artisan Breads: No Knead, One Bowl.

When I made a big bowl of the no-knead bagel dough, I had enough to try a flatbread called "pletzel" that I had read about. Pletzel is a sort of Jewish deep-dish pizza topped with beaten egg and sautéed red onions, then sprinkled with poppy seeds.
As it was baking, the pletzel filled the kitchen with that sautéed onion aroma that always signals “homemade” to me.  Then, when I tasted it, the combination of pillowy dough, crunchy poppy seeds, and caramelized onion was true comfort food. With a bowl of homemade soup, this would be a lunch or casual dinner to banish thoughts of the stock market, your retirement account, or the state of the world in general.
The no-knead dough takes care of some of the worries. Imagine just stirring together a bowl of yeast dough like you would a batch of brownies. (You can, when you use instant or bread machine yeast.) .  No proofing. All the ingredients simply stir together. The extra moisture in the dough takes the place of kneading.  No kneading. Then, letting it rise on your kitchen counter. After rising, the dough can be patted into a baking pan. No rolling. Then baking and topping or topping and baking it. No worrying. Like the loaves and the fishes, flatbreads like this one can fit the occasion, the season, the budget, and the crowd.
Bagel and Bialy Dough
Bagels and bialys came to North American from Eastern Europe with Polish and German émigrés. The hallmark of a good bagel is a shiny texture—from boiling them first—and a chewy crumb—from unbleached bread flour. The secret bagel and bialy ingredient is barley malt or malt syrup, a thick and dark brown sweetener made from sprouted barley. You can find this in the syrup section at better grocery stores, health food shops, or online.
Makes bagels, bialys to serve 12 to 16
Equipment:
Measuring cups and spoons
Instant read thermometer
8-cup (2 L) bowl
Wooden spoon or Danish dough whisk
6 1/2 cups bread flour, plus more for dusting          
2 1/2 tbsp instant or bread machine yeast   
1 ½ tbsp kosher salt   
½ cup barley malt or malt syrup       
2  large eggs, beaten
¼ cup vegetable oil    
1. Measure. Spoon the flour into a measuring cup, level with a knife or your finger, then dump the flour into a large mixing bowl.
2. Mix. Add the yeast and salt to the flour. Stir together with a wooden spoon or Danish dough whisk. Mix the barley malt, eggs, and vegetable oil together in a 4 cup (1 L) glass measuring cup. Pour in enough hot water to reach the 4-cup (1 L) mark and carefully whisk to blend. Pour this mixture into the dry ingredients, stir to create a lumpy dough, then beat 40 strokes, scraping the bottom and the sides of the bowl, until the dough forms a lumpy, sticky mass.
3. Rise. Cover the bowl plastic wrap and let rise at room temperature 72°F (22 °C) for 2 hours or until the dough has risen near the top of the bowl and has a sponge-like appearance.
4. Use Right Away or Refrigerate. Use that day or place the dough, covered with plastic wrap, in the refrigerator for up to 3 days before baking.


Pletzel
A pletzel is a flatbread made with bialy or bagel dough, sort of a Jewish deep-dish pizza topped with sauteed onion and poppy seeds. True comfort food, pletzel is delicious with slow-simmered soups and stews, salads, or beer.
Makes 1 large pletzel to serve 16
Equipment:
Serrated knife
Dough scraper
Rolling pin
1 large baking sheet lined with parchment paper
Baking stone
Broiler pan
Topping:
2  medium red onions, chopped
¼ cup vegetable oil    
1/2 recipe prepared Bagel and Bialy Dough
Unbleached bread flour for dusting
1 large egg, beaten
Poppy seeds for sprinkling
2 cups hot water for broiler pan       
1. Make Topping. In a large skillet, heat the oil over medium-high heat and sauté the onions, stirring often, until transparent, about 8 minutes. Set aside to cool.
2. Form. To form a pletzel, remove half of the dough—about the size of a volleyball—with a serrated knife and a dough scraper. The remaining dough in the bowl will deflate somewhat. Transfer the dough portion to a floured surface and dust very lightly with flour. Flour your hands. Working the dough as little as possible and adding flour as necessary, roll the dough into a 10 by 12-inch (25 by 30 cm) rectangle. Lightly flour any sticky places on the dough. The dough should feel soft and smooth all over, like a baby’s skin, but not at all sticky. Transfer to the prepared baking sheet.
2. Rest. Brush the beaten egg all over the dough. Spread the topping over the dough, leaving a 1-inch perimeter, then sprinkle with poppy seeds. Cover with a tea towel and let rest at room temperature for 1 hour.
3. Prepare Oven for Artisan Baking. About 30 minutes before baking, place a broiler pan on the lower shelf and a baking stone on the middle shelf of the oven. Preheat to 450°F.
4. Slide Flatbread onto Baking Stone and Add Water to Pan. Using an oven mitt, carefully pull the middle rack of the oven out several inches. Place the pan of flatbread on the hot stone. Pull the lower rack out, pour the hot water into the broiler pan, and push the lower rack back in place. Close the oven door immediately so the steam will envelop the oven.
5. Bake. Bake for 20 to 22 minutes or until the crust is puffed and golden brown. Transfer to a rack to cool. Cut into slices to serve.

Praise and Plenty Cupcakes

Inspired by the Garden—and a Contemporary Quilt Design
“We all have hometown appetites. Every other person is a bundle of longing for the simplicities of good taste once enjoyed on the farm or in the hometown left behind,” wrote Clementine Paddleford—food writer, tastemaker, and cookbook author—whose hometown was Stockdale, Kansas.  That’s especially true for desserts.

Sometimes dessert inspiration comes from surprising sources. When I was looking through the Home for the Holidays pattern book by Missouri quilt designers Linda Brannock and Jan Patek, I found the germ of an idea—even though I’m not a quilter (and no one would want anything I had ever sewn, to be perfectly honest here).


Brannock and Patek’s “Praise and Plenty” quilt in muted yellow, green, and orange on a creamy white background, surrounded by a border in homespun plaid suggested a twist on traditional carrot cake to me.  Hmmmmmmmm……..

Maybe grated carrots, zucchini, and yellow squash??  Maybe an intriguing blend of spices, too—citrus-tasting coriander, warm cinnamon, and snappy ginger.  Hmmmmmmm……

One bowl of batter later, here it is (and in Heartland: The Cookbook). Cupcakes using garden “plenty” in a way that will garner “praise” for a family get-together, an end-of-summer party, your bid for Room Parent of the Year, or a delicious scratch to that I've-Got-to-Have-Carrot-Cake itch. 

Use small, trimmed zucchini and yellow squash and grate them whole. If you like, spoon the batter into retro-colored cupcake liners from Bake It Pretty http://www.bakeitpretty.com/. Traditional cream cheese frosting and a candied “garden confetti” are the crowning glories.


Praise and Plenty Cupcakes
Makes 3 dozen cupcakes

6 large eggs, at room temperature
3 cups sugar
2 cups canola oil
3 3/4 cups all-purpose flour
1 tablespoon baking soda
1 tablespoon baking powder
1 1/2 teaspoons salt
1 1/2 cups grated zucchini
1 1/2 cups grated yellow summer squash
1 1/2 cups grated carrot
1 teaspoon ground coriander
1 teaspoon ground cinnamon
1 teaspoon ground ginger
1 1/2 cup raisins
1 1/2 cups chopped pecans or walnuts

Cream Cheese Frosting:
2 (8-ounce) packages cream cheese, softened
5 tablespoons unsalted butter, softened
5 cups confectioners’ sugar
1 tablespoon vanilla extract

Garnish:
½ cup grated zucchini
½ cup grated yellow squash
½ cup grated carrots
¼ cup sugar
2 tablespoons water
1 teaspoon lemon zest

1. Preheat the oven to 350°F. Line cupcake pans with 36 liners, and a small baking sheet with parchment paper, and set aside.

2. Beat the eggs with the sugar in a large bowl until light and frothy. Beat in the oil. Sift the flour, baking soda, baking powder, and salt together and add to the egg mixture, a cup at a time, beating well after each addition. Stir in the grated vegetables and spices until well blended. With a rubber spatula, fold in the raisins and nuts until well blended. Fill the cupcake liners ¾ full.

3. Bake, in batches, on the center oven shelf for 20 to 25 minutes, or until a cake tester inserted in the center or a cupcake comes out clean. Cool completely.

4. For the frosting, beat together the cream cheese and butter in the large bowl of an electric mixer.  Add the sugar and vanilla and beat until smooth. Frost the cupcakes after they have cooled and while the frosting is soft and spreadable.

5. For the garnish, combine the grated vegetables, sugar, and water in a saucepan over medium-high heat. Cook, stirring, until the vegetables are translucent and you have a candied confetti. When cool enough to handle, sprinkle the confetti on the top of each frosted cupcake.

Berry Delicious

Picking the Best Summer Berry Desserts

Berry picking is a rite of summer that combines adventure and reward. It’s also something our family has done here and in Europe. 
When we lived in London, I packed up the kids for a long weekend in Cornwall where I was researching a story on Daphne du Maurier, who set several of her novels there (among them Rebecca, Frenchman’s Creek, and my personal favorite The House on the Strand.) The kids and I left our hotel one sunny morning, parked the car on a country lane, and hiked a path by the beach—picking and eating blackberries along the way.

Fowey in Cornwall

If you want to go along, at least in spirit, read a London Sunday Times literary “walk” story about Daphne du Maurier’s Cornwall--preferably while eating berries, to get the full effect.  
At the Frilandsmuseet or Open Air Museum in Copenhagen during another summer, we got a literal taste of Danish life in the 18th and 19th centuries—blackcurrants growing near a smallholder’s cottage. These tiny berries have a rich, deep berry flavor. In England, blackcurrant syrup was given to children as a good source of Vitamin C during World War II, when rationing limited other fruits. Today, blackcurrant is still a favorite flavor; my children still love blackcurrant drinks and candies known as pastilles. But unless you grow your own, blackcurrants are hard to come by in North America.


A Cottage at the Frilandsmuseet in Denmark


If you can’t pick berries in Denmark this summer, at least you can take a virtual video tour here. http://www.natmus.dk/sw20384.asp
Of course, the best way to enjoy summer berries is to pick them locally and do the least to them as possible.  After you’ve eaten your fill while you pick, here are summer dessert recipes to make the most of your bounty.
Summer Pudding
As a salute to our European berry-picking ways, this quintessential English dessert or “pudding” needs to be better known and appreciated here.  You simply line a medium mixing bowl with crustless pieces of bread (Pepperidge Farm works well for this). You heat the berries until their juices begin to run, then pour in the filling. You top it with more bread and weight it down with a can. The next day, you turn it out, cut yourself a big slice, and enjoy it with a dollop of whipped cream or some frozen yogurt.
Serves 8
8 thin slices good-quality stale bread, crusts removed
6 cups fresh or frozen mixed berries, such as blackberries, blueberries, strawberries, raspberries, etc.
¼ cup granulated sugar or to taste
Lemon juice to taste
1. The night before you wish to serve this dessert, cut the bread slices so they fit in the bottom, sides, and top of a small to medium mixing bowl. Line the bottom and sides of the bowl.
2. Combine the berries and sugar in a medium saucepan and bring to a simmer. Cook until the juices just begin to run. Taste, and if necessary, add more sugar. Stir in lemon juice to taste. Pour and spoon the berries into the bread-lined bowl. Cover the top with the remaining bread slices. Sit a small place on top of the bread “lid” and weight the plate with a heavy can. Refrigerate.  The pudding is done when the reddish-purple juices have permeated the bread.
3. To serve, loosen the sides with a knife or metal spatula, then carefully invert the pudding onto a serving plate.


Summer Pudding


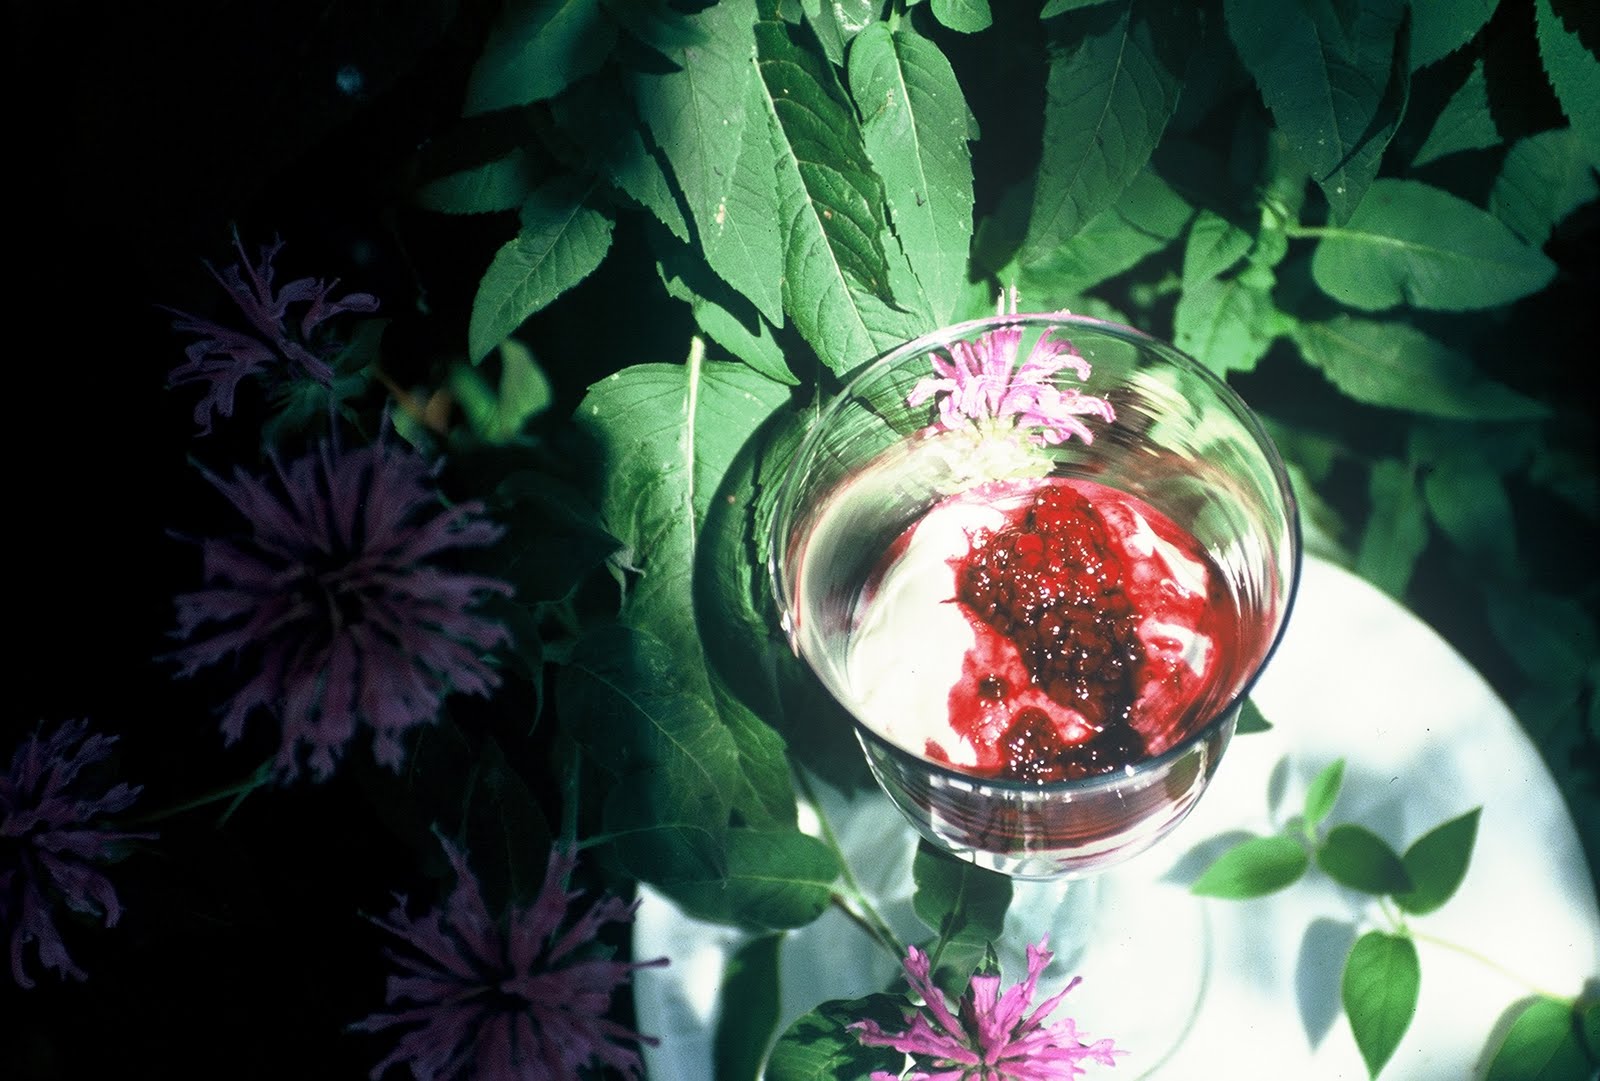
Wildflower Honey Creams with Warm Spiced Berries
Bees make wildflower honey in mid-summer, after they’ve “grazed” on all the wild flowers in bloom. You can also use clover honey, which has a similar medium sweetness. This dessert literally whips up in minutes—sort of a parfait or a crème fraiche dessert with a berry topping.
Serves 8
1 cup heavy or whipping cream
1 cup sour cream
½ cup wildflower honey, divided
3 cups blackberries
1 teaspoon ground cinnamon
Juice of ½ lemon
1. In a mixing bowl, whip the cream until it forms soft peaks. Add the sour cream and ¼ cup of the honey and beat again until well blended. Set aside.
2. Place the berries, remaining ¼ cup of honey, and cinnamon in a saucepan over medium heat. Bring the berries to a simmer. Remove from the heat and stir in the lemon juice.
3. Spoon the honey cream into parfait glasses and top with the warm spiced berries.


Wildflower Honey Cream with Warm Spiced Berries