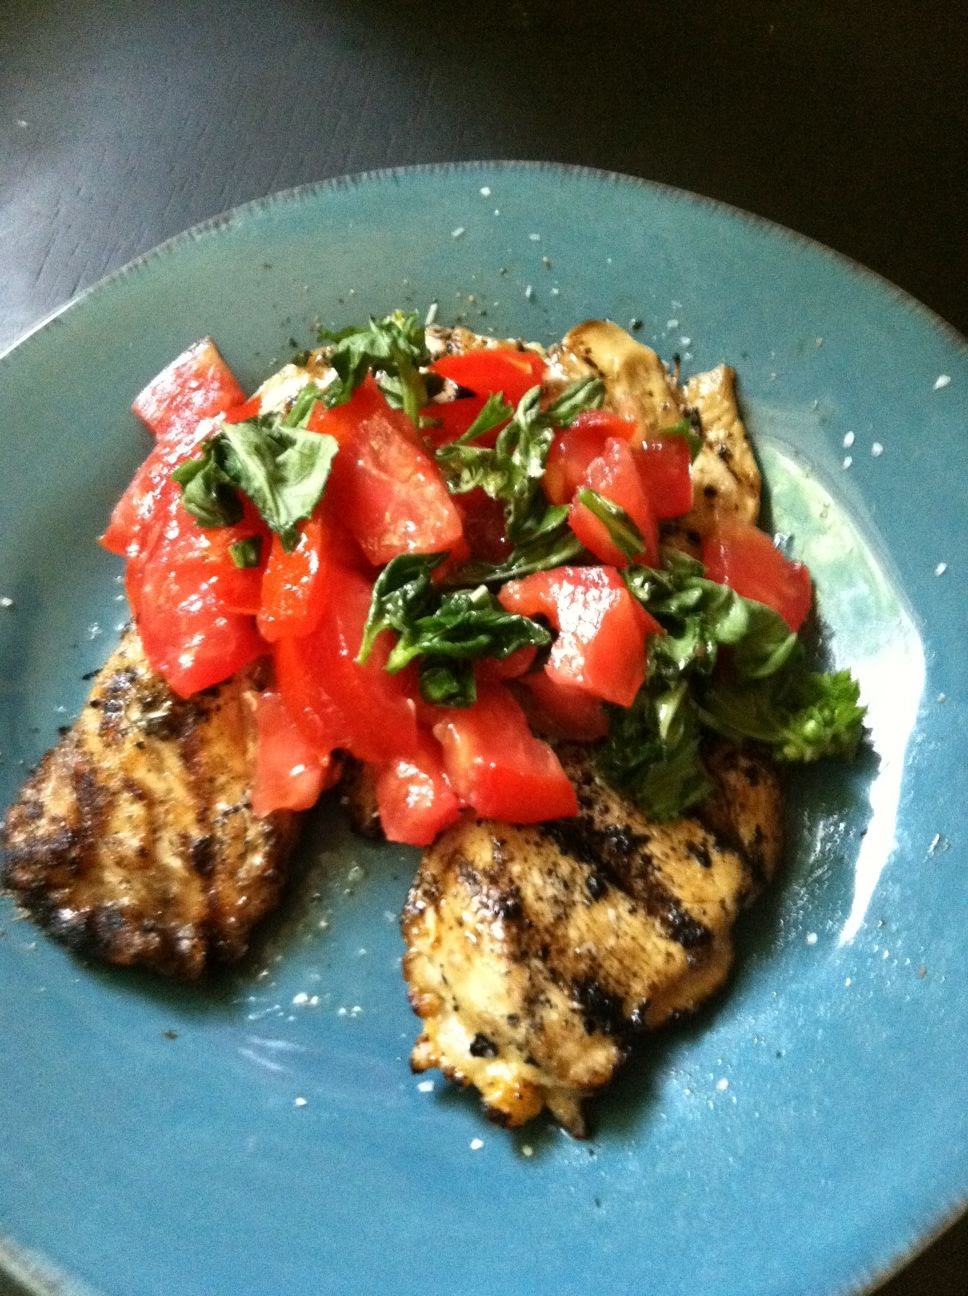
Bistro-Style Chicken on the Grill


Sometimes the seemingly simplest things to grill can be the most difficult. Take the boneless, skinless chicken breast, for example. 


Julia Child popularized this cut during the late 1960s and early 1970s on her groundbreaking PBS cooking program The French Chef. In those days, you had to bone and skin the chicken breast yourself. Now you can pick up a package of boneless, skinless breasts in any grocery store.


When you look at a chicken breast, you’ll see that it’s very thin at the ends and thick in the middle. 


How do you grill it so that every part stays tender and juicy? 
By turning it into a paillard, a French term for a boneless piece of meat that has been flattened to an equal thickness. 


The easiest way I’ve found to do this with chicken is to first turn the chicken breast on its side 


and cut it in half lengthwise.


Then, place each piece between plastic wrap or sheets of parchment paper. Use the flat side of a metal meat tenderizer or a meat mallet. Simply pound the chicken breast, starting in the middle and working your way out to the sides, until the chicken is of an even 1/4- to 1/2-inch thickness. This technique—and this recipe--also works for veal or pork loin paillards (also known as scallops, or scaloppine in Italian).


On a hot grill outside or in a grill pan over high heat (allow at least 20 minutes for the grill pan to heat up), a chicken or veal paillard will take a total cooking time of 10 minutes per inch of thickness. 
Grill a 1/2-inch-thick paillard for 2 1/2 minutes per side, or 5 minutes total. A one-quarter-inch paillard will take only about 1 1/4 minutes per side, so it makes sense to serve it with equally fast side dishes. 


It only takes a minute or so to make a sauce/side/salad made of chopped fresh tomato, rough chopped basil, a drizzle of extra virgin olive oil, and a squeeze of lemon juice--to your taste.  And this garden-fresh blend tastes fabulous on the chicken.

You can also find lots of other garden-fresh sauce ideas--from Chimichurri to Romesco and more--in The Gardener and the Grill.
http://www.amazon.com/The-Gardener-Grill-Bounty-Garden/dp/0762441119/ref=sr_1_1?ie=UTF8&qid=1339619179&sr=8-1&keywords=the+gardener+and+the+grill


If you like, grill more paillards than you need for a meal. In other words, grill for leftovers. Let the extra paillard cool, then cover and refrigerate them for up to 2 days. Then, just eat the paillard cold from the refrigerator or reheat it in the microwave.

Bistro-Style Chicken on the Grill
Serves 4
4 boneless, skinless chicken breast halves, pounded to a 1/2-inch thickness
Olive oil
Fine kosher or sea salt and freshly ground black pepper to taste
1. Using a chef's knife, cut each boneless, skinless chicken breast in half lengthwise. Place each piece between plastic wrap or parchment paper. Using the flat end of a meat mallet or tenderizer, bang the chicken until it's 1/2-inch thick or less all over. Repeat with the remaining chicken until you have 8 thin paillards.
2. Brush each chicken paillard with olive oil and place on a double baking sheet (one sheet for the raw chicken, the clean one underneath for the grilled chicken). 
3. Start the charcoal in your charcoal chimney. When the charcoal has almost ashed over, dump the hot coals on one side your grill. Add a few sticks of hardwood from your yard, such as oak, maple, apple, peach, or hickory. 
4. Grill the paillards for 2 1/2 minutes per side, turning once. You can tell when to turn them when the perimeter of each paillard turns opaque and white. Season with salt and pepper and serve.


Farm Fresh Favorites


A picture's worth a thousand words.

dinner on the farm-table


I was struck by this photo, taken by LISA BRALTS-KELLY,  of the table set for a farm dinner at Prairie Fruits Farm & Creamery near Champaign/Urbana in Illinois.


And then I went to a real farm-to-table dinner at Green Dirt Farm near Weston, Missouri.
www.greendirtfarm.com/ 
Outdoors in the fresh air or in a barn, a farm dinner is one of those life-affirming experiences that everyone should be able to have. 
If you can't go to one in person, hosting one yourself--in your own "lower 40" backyard--is the next best thing.
For that, of course, you need real farm food from garden, orchard, pasture, creamery, and chicken coop.  
Set your table outside and serve up a few


Farm Dinner Favorites:
Garden Gimlet
The Beet Queen Salad with Smoked Goat Cheese
Tarragon Creamed Corn

First up is the Garden Gimlet. Every farm dinner needs a signature cocktail, and this one is refreshing, herb-scented, and oh-so-delicious. 


Garden Gimlet
From garden to glass, this deliciously refreshing drink is just the thing on a hot day.  In fact, it’s so good, the Garden Gimlet could well become your household’s signature drink. To be really authentic, use a Midwestern-distilled gin, such as Rehorst from Milwaukee, Wisconsin. Adapted from Heartland: The Cookbook http://www.amazon.com/Heartland-The-Cookbook-Judith-Fertig/dp/1449400574
Makes 4 drinks
Fresh Herb Syrup:
1 cup sugar
3/4 cup water
1/2 cup fresh, aromatic herb leaves, packed, coarsely chopped
¾ cup gin
½ cup fresh lime juice
8 fresh basil sprigs
1.  In a large, microwave-safe glass measuring cup, combine the sugar, water, and herbs. Microwave on high until the sugar dissolves, about 3 to 4 minutes. Let the mixture steep for 20 to 30 minutes. Then, strain the mixture into a bowl and let cool.  Use right away or store in a covered glass jar in the refrigerator for up to 2 weeks.
2. Combine the syrup, gin, and lime juice in a pitcher and stir well. Fill 4 highball glasses with ice and muddle each with a basil sprig.  Pour a fourth of the gimlet mixture into each glass.  Stir and serve, each drink garnished with a fresh basil sprig.


The Beet Queen Salad with Smoked Goat Cheese
This salad goes well with anything as far as I’m concerned, and could be a meatless entrĂ©e all on its own. Raw beets have a flavor similar to sweet corn and a texture like jicama, so prepare to be pleasantly surprised. I took a photo of my daughter Sarah, our family’s Beet Queen, holding our salute to this great salad.
Adapted from Heartland: The Cookbook
http://www.amazon.com/Heartland-The-Cookbook-Judith-Fertig/dp/1449400574
Varieties to try: Detroit Red and Ruby Queen, Chioggia (striped), and Burpee’s Golden
Serves 8
Orange Tarragon Vinaigrette
The juice of an orange
The zest of an orange
1 teaspoon Dijon mustard
1 garlic clove, minced
1 teaspoon tarragon vinegar
2 tablespoons fresh tarragon leaves
1/4 cup canola oil
1/2 teaspoon fine kosher or sea salt
6 to 8 cups greens
2 to 3 fresh peaches, peeled and sliced
1/2 cup crumbled Smoked Goat Cheese (page 000) or fresh goat cheese, crumbled
1 medium striped or Chioggia beet, peeled, trimmed, and julienned
1 medium golden beet, peeled, trimmed, and julienned
1 medium red beet, peeled, trimmed, and julienned
1. For the vinaigrette, whisk all ingredients together in a bowl.
2. To assemble the salad, arrange the greens and peach slices on a large platter or serving plate.
Crumble the goat cheese over the greens and peaches. Arrange a confetti of beets on top. Drizzle with the dressing and serve. 
To Smoke Goat Cheese--
Place a log of goat cheese in a disposable aluminum baking pan. Brush the cheese with olive oil.  Prepare a medium, indirect fire in your grill (heat on one side, no heat on the other). For a gas grill, wrap up 1 cup dry wood chips in aluminum foil and poke holes in the top. For a charcoal grill, scatter moistened wood chips on ashed over charcoal.  When you see the first wisp of smoke, place the pan of goat cheese on the indirect or no heat side, close the lid of the grill, and smoke for 30 minutes or until the cheese has a burnished appearance and a smoky aroma. Use right away or keep covered in the refrigerator for up to 1 week.


Tarragon Creamed Corn
Fresh sweet corn and garden-grown tarragon provide the flavors in this new take on a farmhouse classic. This is delicious with grilled, roasted, or fried chicken.
Varieties to try:  Heirloom Country Gentleman, Silver Queen, heirloom Boone County White, Butter and Sugar, or Peaches and Cream.
Serves 4
4 cups fresh or frozen sweet corn kernels
½ cup chopped green onions with some of the green
1 cup heavy cream
1 tablespoon tarragon vinegar
1 tablespoon fresh tarragon leaves
Kosher salt and freshly ground black pepper
Fresh tarragon sprigs to garnish
1. In a nonstick skillet over medium heat, stir the corn, green onion, tarragon, and cream together. Cook, stirring occasionally, until the corn is tender, about 5 minutes for fresh corn, 10 to 12 minutes for frozen.  Stir in the vinegar and cook for 2 more minutes. Season to taste and serve.


Grow, Grill, and Eat Italian!


It's Alfresco Time 

Now we’re coming into the season when the literal meaning of “alfresco” reminds us of how delightful being out in the fresh air truly is.  Clear skies, fresh breezes, mild temperatures, and few bugs.


It’s a great time to be gardening—and grilling. Especially Italian garden goodies.
My Italian garden tour starts with the Heartland, travels to Italy, and then comes back in a surprising way.

Last year, I wrote a story about Cody Hogan, chef de cuisine at Lidia’s in Kansas City, who “tests” heirloom vegetable, fruit, and herb varieties so the restaurant can have farmers grow them for the kitchen. Growing your own plants is the best way to source unusual ingredients like wild fennel or Fennel Sympatico, which is grown for its ferny fronds and seeds, and does not bulb.

Wild Fennel or Fennel Sympatico


Lidia’s, of course, is the restaurant founded by Lidia Bastianich who also has a PBS program. You can find program details, cookbooks, Italian products, videos, restaurant locations, and recipes at her site

To see how Lidia’s favorite plants would fare in the Heartland terroir, Hogan ordered his heirloom seeds from a 229-year-old Italian seed company that now has a “branch” in the Heartland.  In 1783 (think George Washington), Giovanni Franchi started selling seeds from a cart in the market square of Parma, Italy. Today, the Franchi Sementi  ( Franchi “seeds” in Italian) is still family-owned by Giampero Franchi.

Their American outpost "Seeds from Italy" is now located near Lawrence, Kansas, and headed by Dan Nagengast, former director of the Kansas Rural Center and a longtime market gardener.
You can order seeds or a catalog at

Now, let’s visit Cody Hogan’s fabulous garden—and then we’ll eat!

A Tour of Lidia’s “Test Garden” in the Heartland

When he’s not at the restaurant, Cody Hogan grows heirloom Italian herbs, vegetables, and fruits in the backyard of his 1922 bungalow. “It’s sort of a test garden to see how they do in our climate before we ask local farmers to produce them for the restaurant,” he says.

 “It really captures that whole Italian thing: Eating foods that are fresh and being outside,” says Hogan, who has traveled often to Italy with Lidia Bastianich. “In Italy, you see all these gardens in little plots. Everyone grows stuff. It’s inspiring.”

Hogan and partner Peter Crump, created their own Midwestern garden that captures that alfresco spirit.

The garden is laid out in four central beds around a tall obelisk.


In the main beds, dark red Santa Rosa and yellow Shiro plums produce so much “that we have to support the tree until the squirrels arrive to clean house,” says Hogan.  From the fresh plums, Hogan likes to make jams and chutneys flavored with fresh ginger, or simply freeze plum puree to use later on.

Espaliered apple trees—Granny Smith, the antique Esopus Spitzenburg (one of Thomas Jefferson’s favorites), and Mutzu—create an edible border.

In the main four beds, Italian heirloom greens and herbs such as wild fennel, a sweet red radicchio, blood sorrel, and Herba Stella find their way into Hogan’s salads and risottos. “Italians have so many salad greens and herbs that most Americans have never heard of,” he says.


Under a shady pergola along the back wall, an Asian antique farm table provides the perfect setting for alfresco dining. A deep trough pond with water lilies, lotus, and brilliantly colored gold fish add more timeless pleasure.

Along the right side of the garden, Hogan and Crump have built terraced beds for serious vegetable growing:  Romanesco broccoli, heirloom zucchini, Zucca Rugosa (an heirloom butternut squash), Lacinato kale, turnips, beets, peas, and San Marzano Redorta tomatoes “that have the best flavor,” says Hogan. “I love the greens from beets as much as the beets,” he adds. A new asparagus bed sends up ferny shoots. The blue-green foliage of Brussels sprouts and cabbage adds yet another sculptural form to the garden.  Hogan waits to pick sprouts until after the first frost—“Plants produce more sugar when it gets cold, as sort of a natural anti-freeze,” he says.


During the growing months, all of this bounty translates into “instant meals,” he says, but the garden goes year ‘round. During the winter, Hogan and Crump start the seeds in their basement under grow lights.  Hogan might also cook in the living room fireplace (with its poured concrete surround by Crump), using garden goods he has preserved for a taste of “la dolce vita,” even on the coldest day. 

Now that we’ve gardened, it’s time to grill from our new book The Gardener and the Grill.


Italian Garden Recipes
Grilled Summer Slaw with Gorgonzola Vinaigrette
Adapted from The Gardener and the Grill by Karen Adler and Judith Fertig.
Grilled coleslaw? You bet! Grilled cabbage wedges acquire terrific flavor while retaining their crunchiness. Dress the coleslaw right before serving, as the dressing makes the cabbage wilt.
Place the onions perpendicular to the grill grates so they don’t fall through.
Serves 8 to 10


8 green onions, tops trimmed
1 medium head red cabbage, tough outer leaves removed, cut into 4 wedges
1 head Napa cabbage, tough outer leaves removed, cut into 4 wedges
Vegetable oil
8 ounces Gorgonzola blue cheese, crumbled & divided
2 garlic cloves, minced
3/4 cup vegetable oil
1/3 cup cider vinegar
1 teaspoon celery seeds
1 teaspoon kosher or sea salt
1/2 teaspoon freshly ground black pepper
1/4 teaspoon dry mustard
1. Prepare a hot fire in your grill.
2. Brush the green onions and cut sides of cabbage with oil. Grill the green onions on one side for 2 to 3 minutes and remove to a platter. Grill the wedges of cabbage for about 4 or 5 minutes on each cut-side, turning once (a total of 8 to 10 minutes) until they have good grill marks on both sides.
3. Finely chop the grilled cabbage and coarsely chop the green onions. Combine them in a large bowl. Let cool, then stir in half of the Gorgonzola. In another bowl, whisk together the garlic, vegetable oil, vinegar, celery seeds, salt, pepper and mustard. Add the remaining Gorgonzola and stir to blend. Pour the dressing over the cabbage mixture and toss to coat. Serve at once.

Grilled Pepper Boat “Sandwiches”
Adapted from The Gardener and the Grill by Karen Adler and Judith Fertig.
These open-faced, boat-shaped sandwiches—with a grilled bell pepper as “bread”—are a fresh, low carb take on the concept.
Serves 4


Herbed Cream Cheese:
8 ounces cream or vegan cream cheese, at room temperature
1 garlic clove, minced
2 tablespoons chopped fresh basil
1 tablespoon snipped fresh chives

2 large yellow, orange, or red bell peppers, stemmed, seeded and quartered
Olive oil, for brushing and drizzling
1/2 cup finely chopped fresh yellow, orange, or red tomato
1/4 cup chopped Italian parsley
1. Prepare a medium-hot fire in your grill.
2. Place a well oiled perforated grill rack over direct heat.
3. Brush the skin side of each pepper with olive oil. Dollop a spoonful of Herbed Cream Cheese in each pepper boat. Transfer the boats to the perforated grill grate, cover, and grill until the bottoms are scorched and the cheese has melted, 4 to 5 minutes. Serve sprinkled with tomato and parsley and a drizzle of olive oil. Serve hot with a knife and fork.

Stir-Grilled Nectarines & Plums with Sweet Wine Drizzle
Adapted from The Gardener and the Grill by Karen Adler and Judith Fertig.
The colors in this dish are just gorgeous. If you like, serve this in stemmed wine glasses with a dollop of honeyed Greek yogurt.
Serves 4


2 nectarines, halved, seeded, and sliced
4 to 6 plums, halved, seeded, and sliced
Sweet Wine Drizzle
1/4 cup honey
1/4 cup sweet wine, red or white
1. Prepare a hot fire in your grill.
2. Place the fruit in a perforated grill wok and set aside.
3. Heat the honey and stir in the wine. Keep warm.
4. Place the grill wok directly over the fire and toss the fruit with wooden paddles or grill spatulas until they are heated through and a bit charred about 6 to 8 minutes.
To serve, spoon fruit into 4 bowls and drizzle with the warm honey-wine mixture.


Everything's Coming up Rhubarb!

Right now, I'm looking at the world through a rose-colored lens. The "rose" just happens to be rhubarb.


Stalks of pink and lime green rhubarb are growing tall in the garden, joining sugar snap peas, early broccoli, frilled lettuce, bok choy, and herbs of all kinds. 


Although rhubarb-lovers usually think strawberry and rhubarb pie, there are a lot more ways you can make the most of your rhubarb harvest. (And convert those who think they don't like rhubarb.  They just haven't had it paired with the zing of fresh lemon.)


From featuring in a fresh syrup to a flavored lemonade, eat-it-all-up fruit crisp, and signature ice cream, rhubarb is a garden-to-table ingredient at its springtime best.


When you have extra, chop up stalks of rhubarb (discard the leaves, as they can be poisonous to pets and children), and freeze the pieces in 4-cup freezer bags.  That way, you can enjoy rhubarb all year long.


Rosy Rhubarb Syrup
4 cups chopped rhubarb, fresh or frozen and thawed
1 cup water
2 cups sugar
The juice of 2 lemons
1. For the syrup, place the rhubarb and water in a saucepan over medium-high heat and bring to a boil. 


Reduce the heat to medium-low, cover, and cook the rhubarb until tender and pulpy, about 10 minutes.  Strain off the rhubarb pulp, reserving the juice. Measure the juice and add enough water to equal 2 cups. Return the liquid to the saucepan over medium-high heat and stir in the sugar. Bring to a boil so the sugar dissolves, about 8 minutes. Remove from the heat, stir in the lemon juice, and let cool.  


Strain again, then pour into clean glass jars or bottles. (Refrigerate, covered, for up to 1 month.) Makes about 2 cups.

Porch Swing Lemonade
Wouldn’t it be nice to sit on the porch swing and visit with your neighbors, sipping a homemade lemonade? You really can sit back and relax if you make the syrups a few weeks or days ahead. Squeeze the fresh lemon juice right before you want to serve the drink. Stir it all together in a pitcher or portable container, and serve over ice. Adapted from Heartland: The Cookbook.
Serves 4 to 6
1 cup freshly squeezed lemon juice (from about 7 large lemons)
1 1/2 cups Rosy Rhubarb Syrup 
1 1/2 cups water
Sugar, for sweetening
Fresh lemon slices, for garnish
 Sprigs of lemon balm or rosemary, for garnish
Stir the lemon juice, syrup, water, and sugar together in a large pitcher. Add lemon or lime slices and herb sprigs, if you wish.  Add more sugar to taste, if desired. Serve cold.


While I"m on the rhubarb kick, I'll add two tried-and-true rhubarb recipes without photos. Even if people think they don't like rhubarb, they seem to gobble up this crisp and this ice cream . . . .

Lemon-Zested Mulberry and Rhubarb Crisp

I have made this crisp countless times. It's delicious as a dessert, but it's also fabulous for breakfast with a little dollop of Greek yogurt. The mulberry is a large bush/small tree that has three differently shaped leaves. If you can't find mulberries growing wild (lining parking lots where scrub trees grow), you can use blackberries. In much of the Midwest, they ripen in mid to late June and are very perishable, which is why you don't see them at farmer's markets or grocery stores.  This recipe is a great reason to gather them yourself.  Adapted from Prairie Home Cooking. Serves 6 to 8.

Topping:
1 cup all-purpose flour
1 cup granulated sugar
Zest of 1 lemon (save the rest for juice)
1/2 cup butter, somewhat soft

Filling:
4 cups rhubarb, cut into 1-inch pieces
2 cups mulberries, cleaned (or use blackberries)
1 cup granulated sugar
1 tablespoon instant tapioca
Juice of 1 lemon


1. Preheat the oven to 375 degrees.  
2. For the topping, combine the flour, sugar, and lemon zest in a small bowl.  Using your fingers, rub the butter into the flour mixture to form large crumbs; set aside.  
3. In a large bowl, mix the fruit together and add 1 cup of the sugar, the tapioca, and lemon juice.  Stir to blend.  Butter the inside of a large baking dish and then put in the fruit.  Sprinkle topping on the fruit and bake for 35 minutes or until lightly browned and bubbling.

Lemony Rhubarb Crumble Ice Cream

This pale pink ice cream tastes as lovely as it looks. Just don't tell anyone it has rhubarb in it, and they'll never know.  You make this in three stages: the baked lemon sugar cookie crumble, the baked rhubarb, and then the ice cream. Makes 1 generous quart.

For the Crumble:
1/4 cup flour
1 teaspoon lemon zest
1/4 cup sugar
2 tablespoons butter, softened

Preheat the oven to 350 degrees. In a smaller bowl, combine the  flour, lemon zest, and sugar.  Using your fingers, rub the butter into the flour mixture to form large crumbs.  Sprinkle these large crumbs in a baking dish and bake at  350 degrees for 7 to 10 minutes, or until the crumbles begin to brown.  Set aside to cool, but keep the oven on.

For the Ice-Cream:
1 pound rhubarb, trimmed into 1/2-inch pieces
2 cups heavy  cream
1-1/4 cups sugar
1 tablespoon fresh lemon juice

 
1.  Place the rhubarb in a large, shallow baking dish along with the sugar and the lemon juice. Place the dish on a lower shelf in the preheated oven for 25 to 30 minutes or until tender when pierced with a knife.  Remove from the oven and let cool.  Transfer the rhubarb to the food processor and puree until smooth. 

2.  Before making the ice cream, use your hands to break up the cooled crumble into small, pea-sized pieces (if they're too big, the pieces are unwieldy to eat
in the ice cream; if they're too small, they disappear when the ice cream churns). Next stir the cream into the rhubarb puree, pour into an ice-cream maker and churn until the mixture has the consistency of softly whipped cream. Then, quickly stir in the crumble pieces. Finish freezing the ice cream according to manufacturer's directions.  If frozen solid, the ice cream will need to be transferred to the fringe for about 25 minutes before serving, to allow it to become soft enough to scoop.